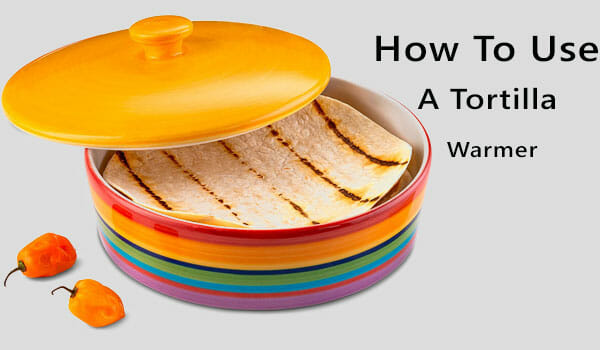
Tortillas let you get creative with a wide variety of dishes, like burritos, quesadillas, French toast wraps, and what not?
Even if you don’t feel like making something out of that disc-shaped flatbread, you can simply eat them by dipping them into meat or vegetable curry.
Sounds delicious, right?
Since tortillas need to be warmed before use, do you always turn on the stove?
If you do, then know that you can save your time by embracing an advanced option- and it is none other than a tortilla warmer.
Tortilla warmers come in a variety of materials and designs, and they ensure warm and soft tortillas in just an instant.
So, if you want to save your time warming a stack of tortillas on the stove, follow this guide to learn how to use a tortilla warmer.
Let’s get started!
Types Of Tortillas
The most common type of tortillas are either made of flour or corn and are best served when they’re soft and warm.
You can use any type of tortilla warmer to warm either type of tortilla, but in order to do so effectively, you will need to note the characteristics of the tortillas.
Unlike corn tortillas, flour tortillas are susceptible to moisture, and so they often get soggy while warming.
It is a good idea to check the flour tortillas while warming them, and if they become soggy, all you need to do is take off the lid of the tortilla warmer and leave them open for a few minutes.
Another thing to keep in mind, corn tortillas take a little longer to heat up than flour tortillas, so you can’t expect to have them warmed at the same time.
Types Of Tortilla Warmers
1. Plastic Tortilla Warmer
Plastic tortilla warmers are an inexpensive option for heating a stack of tortillas. Since these circular vessels are microwave-safe, you can heat the tortillas and store them inside.
Some tortilla warmers might not have a microwave-safe lid, so you will need to take it off before placing the vessel in the microwave.
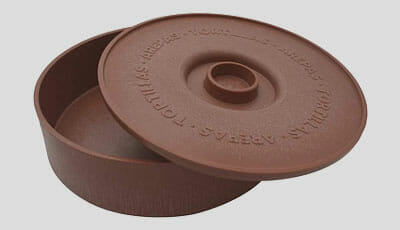
When using a plastic tortilla warmer, keep in mind not to put it inside a hot oven because the plastic can melt and get into the tortilla.
2. Ceramic Tortilla Warmer
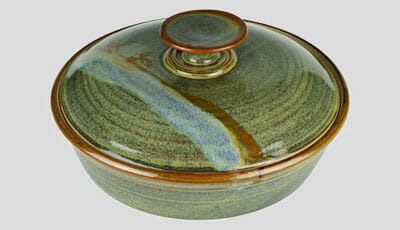
Like their plastic counterpart, ceramic tortilla warmers also have a circular shape with a removable lid.
These bowls are durable and can hold a stack of tortillas. Besides the microwave, you can also put it in the oven, and the tortillas will be evenly heated.
3. Electric Tortilla Warmer
If you don’t have an oven or a microwave, you can purchase an electric tortilla warmer. These appliances usually resemble that of a toaster, where you put a tortilla into the slot, select the heating time, and then the heated tortilla will pop up.
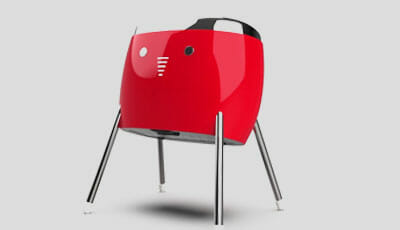
Some commercial electric tortilla warmers are expensive, but they let you heat up stacks of tortillas much quicker.
Such tortilla warmers feature a drum that keeps rolling as you put tortillas into the slot and then eject the heated tortillas from the bottom of the appliance.
Apart from that, you will also find flat grill warmers that let you place up to four or five tortillas and heat them at once.
4. Fabric Tortilla Warmer
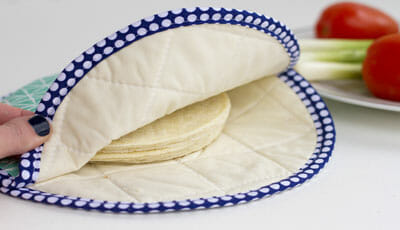
Fabric tortilla warmers are round-shaped pouches where you place the tortillas and heat them in the microwave oven.
These are great for heating a stack of tortillas evenly and keeping them warm. While fabric tortilla warmers are available in various patterns, you can also make one at home.
5. Aluminum Foil
Aluminum foil can come in handy at times, even for keeping tortillas warm. If you have a conventional or a toaster oven at home, you can wrap the tortillas in aluminum foil and put them inside the oven. Once done, the tortillas will remain warm inside the foil for up to 30 minutes.
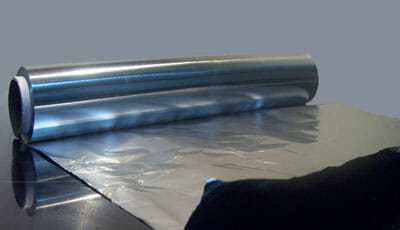
You should never use food completely wrapped in aluminum foil in the microwave. That’s because the microwave’s electric fields overwhelm the metal foil, which results in ignition.
How To Make A Fabric Tortilla Warmer?
Materials Required
- 100% cotton fabric for the outside layer (you can choose any print you like)
- 100% cotton fabric for the inside layer (this one should be plain because it will touch the tortillas)
- 12″ x 12″ square pieces of 100% natural cotton batting (you can choose Pellon Wrap-N-Zap since it is microwave-safe)
- Cotton thread
- Scissors
- Sewing machine
- Sewing pins
- A large plate or bowl
Step 1: Draw A Circle
Take the large bowl or plate and use its rim to draw an 11-inch circle on one piece of the batting.
Step 2: Stack The Fabric Pieces
Stack two layers of patterned fabric, two layers of plain fabric, and two layers of batting under the batting pattern. Secure the fabric pieces on all four sides with sewing pins.
Step 3: Cut The Fabric Pieces
Take the scissor and cut out all the fabric pieces into a circular shape. Remove the sewing pins.
Step 4: Make Two Circular Fabric Sandwiches
Take one of the batting layers and lay it on a flat surface. Place a layer of the patterned fabric with the right side facing up on top of the batting.
Then sandwich the patterned fabric by placing a layer of the plain fabric. Repeat this step to make a second fabric sandwich.
Step 5: Sew The Fabric Layers
Sew a quarter-inch seam around the edge of the fabric layers. Make sure to leave a small gap on the edge so that you can turn the right sides out. Repeat this step for the other fabric sandwich.
Step 6: Pull The Right Sides Out
Reach for the small gap and turn the fabric pieces’ right sides out. One side should now have the patterned fabric, while the other, plain fabric. The batting should now be in the middle. Repeat this step for the other sewn fabric.
Step 7: Iron The Sewn Fabric
Fold the raw edge of the fabric so that the batting doesn’t show. Pin the folded edge and iron both sides of the sewn fabric. Repeat this step for the other sewn fabric.
Step 8: Make A Top Stitch
Make a top stitch on either side of the sewn fabric using a sewing machine. You can either make straight stitches or zigzag stitches depending on your preference. Repeat this step for the other sewn fabric.
Step 9 (Optional): Quilt On Top Of The Fabric
This is an optional step. You can either leave the fabric plain or quilt it to prevent the batting from crumbling up after washing.
Take a tailor’s chalk and draw lines about an inch apart across the fabric. Make a straight stitch along the lines with the sewing machine. Repeat this step for the other sewn fabric.
Step 10: Joining The Fabric Pieces Together
Take the two fabric pieces and stack them with the right sides facing out, making sure the quilting lines are aligned in the same direction.
Pin around the edges of the fabric, going two-thirds all the way up (you can also use a fabric clip). Stitch the fabric from the starting two-thirds mark to the ending mark.
How To Use A Tortilla Warmer?
If you’re unsure of how to heat tortillas in a plastic or ceramic tortilla warmer, follow these steps:
Step 1: Line The Tortilla Warmer
Place a paper towel on your microwave-safe tortilla warmer and then put the stack of tortillas you want to heat. Make sure to place the tortillas one by one in order to prevent sticking.
Step 2: Microwave The Tortillas
Place the tortilla warmer in the microwave. For every four tortillas, you will need to heat for 15 seconds. Keep microwaving in 15-second intervals until all the tortillas are heated well.
Step 3: Remove The Tortilla Warmer
Take out the tortilla warmer with the lid still on. This ensures the tortillas don’t lose heat. Only remove the lid when you’re about to serve on the table.
See also: Easy tips to use tortilla press
How To Use A Fabric Tortilla Warmer?
Step 1: Load The Tortillas
Take the clean fabric tortilla warmer and load it with tortillas. You can load them as deep as they can go.
Note: Before choosing a fabric tortilla warmer, make sure it is microwave-safe, otherwise, heat can damage the fabric.
Step 2: Microwave The Tortillas
Close the flap of the fabric tortilla warmer and place it in the microwave. Start microwaving by setting the timer to 15 seconds.
If the tortillas don’t get warm in 15 seconds, there are probably more tortillas, and so you will need to increase the time.
Step 3: Remove The Tortilla Warmer
Open the flap to check if all the tortillas are heated well. Take out the tortilla warmer from the microwave and serve the warm tortillas on the table.
How Long Do Tortillas Stay Warm?
You can never enjoy cold tortillas unless you warm them. While you can do so with tortilla warmers, not all of them are designed to keep tortillas warm for the same length of time.
Plastic tortilla warmers can keep tortillas warm for up to 20 minutes, which is long enough for you to finish important tasks before making a batch of tacos.
Ceramic tortilla warmers are designed to keep tortillas warm for about an hour. If you keep tortillas more than the specified time, there’s a high chance of the tortillas drying out.
With a fabric tortilla warmer, you can keep tortillas warm for an hour, and with foil paper, about 30 minutes.
Final Word
Warming tortillas one-by-one can be a tedious task. It can be even frustrating, especially when you have guests, and you need to get it done quickly.
If only you ditch the conventional way of warming tortillas and stick to the alternatives mentioned in this guide, you’ll surely be able to warm a stack super quick!
There’s no need to purchase all types of tortilla warmers, but the one that works great for you.
You can either choose the tortilla warmer that works in the microwave or if you don’t have a microwave, you can get the one that works in your existing oven. The choice is yours!
Related:
SeaRanchLodge.com is a participant in the Amazon Associate program and will earn from qualifying purchases.


